My very first experiments with Three.js were with jewellery for my Wentworth Jewels project, but that was 2-3 years ago. I wanted to return to the challenge of presenting jewellery for my client now I can create stunning looking gems and the funcionality to load different rings, gems and metal types allowing a customer to really customise and visualise their dream peice.
This project is a work in progress as my client is acquiring all their product 3D assets.
Visitors are welcomed with a scroll driven experience that zooms the user into a beautiful gazebo where there are four tables to customise the ring, gem, metal and preview on their phone with AR.
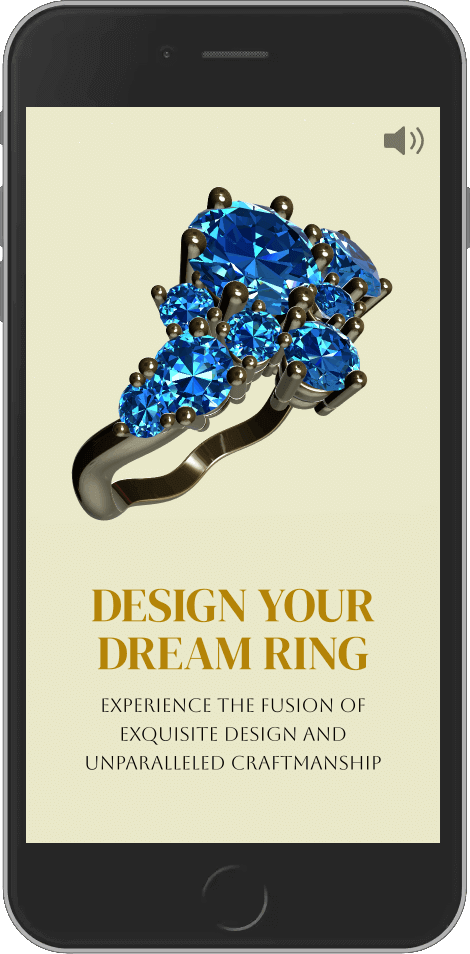
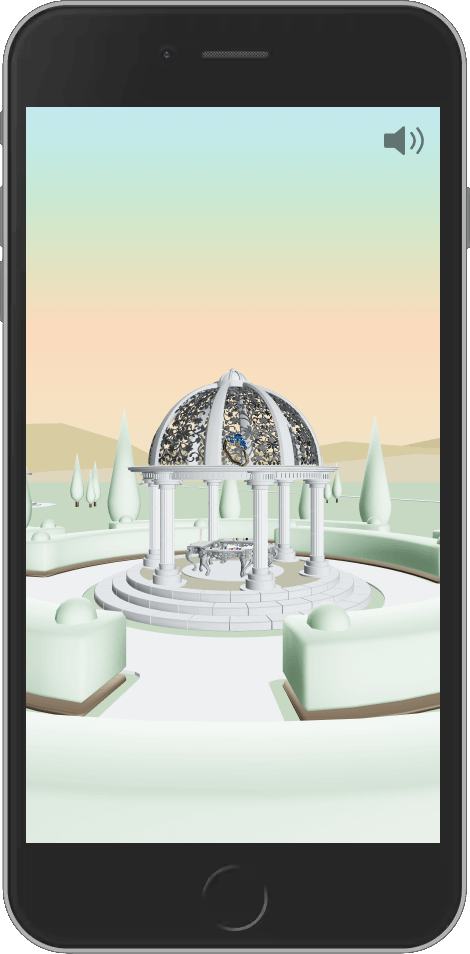
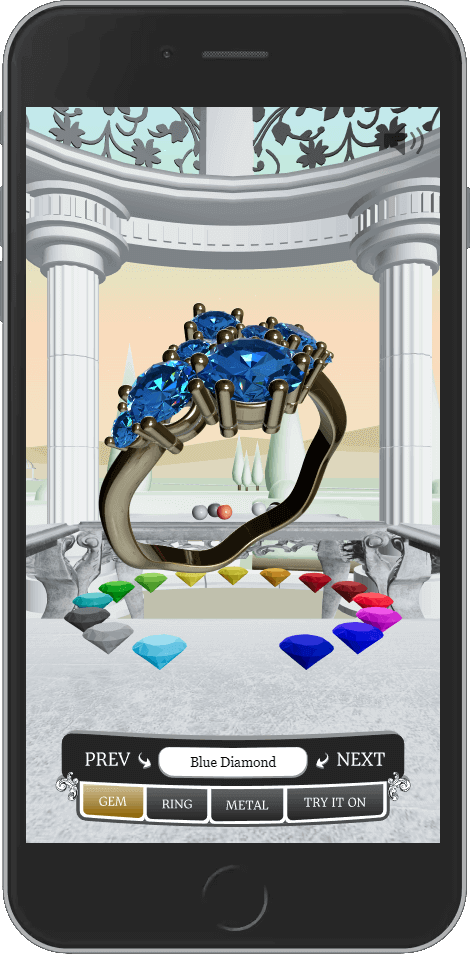

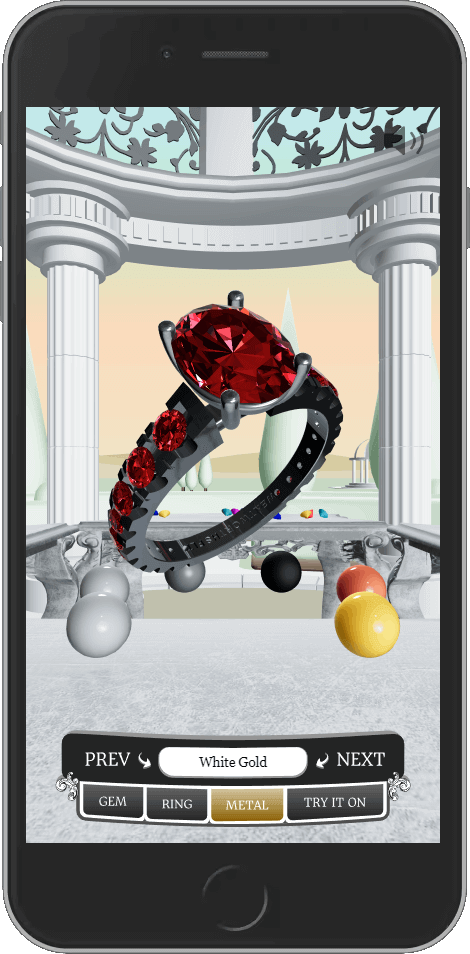
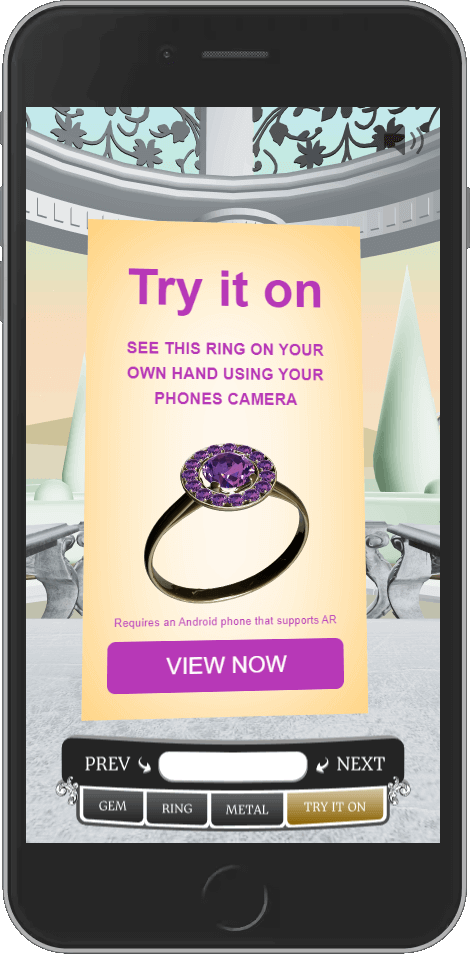
The desktop version has some extra polish with "raining diamonds" during the intro and a wider perspective of the gazbeo scene whilst showing off more dazzeling gems.


Scrolling affect to control the camera and scene
This website uses the impressive scrolling technique where the users scroll progress controls the progress of an animation. This is achieved using Drei's ScrollControls, a GSAP timeline and seek function, combined with React Three Fibers (R3F) useFrame() loop:
First I create a AppScrollControls component for Drei's ScrollControls, allowing me to toggle when the scroll behaviour is enabled, the number of pages which determines how much scrolling and how fast the animation plays and the damping which adds a really nice smoothing affect to the animation:
import { ScrollControls } from '@react-three/drei'
import { useAppStore } from '../../store/store'

import { checkIsMobile } from '../../utilities/checkIsMobile'

export const AppScrollControls = ({ children }) => {
    const isIntroActive = useAppStore((state) => state.isIntroActive)
    const isMobile = checkIsMobile()

    return (
        <ScrollControls
            enabled={isIntroActive}
            pages={isMobile ? 7 : 14}
            damping={isMobile ? 0.15 : 0.3}
        >
            {children}
        </ScrollControls>
    )
}
Then in my App component, once the website has loaded and the user has clicked the button to begin (toggling some hasClickedToBegin state), I then start to build my GSAP timeline:
useEffect(() => {
    if (hasClickedToBegin) {
        tl_intro.current.addLabel("pre animation setup")

        tl_intro.current.to(
            ringRef.current.position,
            {
                duration: 4,
                x: isMobile ? 0 : 2.3,
                y: isMobile ? 1.5 : -0.3,
                z: isMobile ? -4 : -1.85,
                ease: "power1.inOut",
            },
            "pre animation setup"
        )
        tl_intro.current.to(
            ringRef.current.rotation,
            {
                duration: 4,
                x: 1.29,
                y: -0.94,
                z: 0,
                ease: "power1.inOut",
            },
            "pre animation setup"
        )
        tl_intro.current.to(
            introTitle1Ref.current.position,
            {
                delay: 2.85,
                duration: 2.5,
                x: introTitle1Positions.xEnd,
                ease: "power1.inOut",
            },
            "pre animation setup"
        )
        tl_intro.current.to(
            introScrollMsgRef.current.position,
            {
                delay: isMobile ? 4.25 : 5,
                duration: 1.5,
                y: introScrollMsgPositions.yEnd,
                ease: "power1.inOut",
            },
            "pre animation setup"
        )
        // ... the rest of the animation code is trimmed out for this explanation
    }
}, [hasClickedToBegin])

const scroll = useScroll()

useFrame(() => {
    tl_intro.current.seek(scroll.offset)
})
I then have a useFrame loop from R3F, that tells the GSAP timeline animation to take the users scroll position (provided by Drei's useScroll hook), and translate that to the relative frame in the animation with the seek method.
I've done a lot of work with GSAP in other projects and I really enjoy how I can compose complex animations and control specific values in fine detail, ochestrating multiple elements with precise timing, delays and easing.
This combination of GSAP, Drei and R3F made it easy to split the responsibilities of scrolling, animating and componetising this attractive scroll affect.
Instanced Mesh for Raining Diamonds
instancedMesh is a Three.js feature that allows you to render many copies of the same object with different transformations (position, rotation, scale) but without duplicating the underlying geometry and material, which saves memory and improves rendering speed. Only one draw call is made for all instances of the object, rather than making separate draw calls for each object. Fewer draw calls improve performance, especially when rendering thousands or even millions of instances.
This is such a cool feature to work with, it never fails to blow my mind.
Here is my RainingDiamonds component, which creates a visually appealing animation of diamonds continually falling from the sky.
export const RainingDiamonds = () => {

    // Global state:
    const { camera } = useThree()
    const isMobile = checkIsMobile()

    // Local state:
    const [positions, setPositions] = useState([])

    // Local init:
    const diamondsRef = useRef()
    const { nodes } = useGLTF("/diamond.glb")
    const zPositionOffset = -7
    const screenTo3DCoordinates = useMemo(
        () => getScreenEdgesInWorldCoordinates(camera, zPositionOffset),
        []
    )

    const settings = {
        diamondCount: isMobile ? 10 : 20,

        xLeft: screenTo3DCoordinates.left - 10,
        xRight: screenTo3DCoordinates.right + 10,
        yTopMin: screenTo3DCoordinates.top + 5,
        yTopMax: screenTo3DCoordinates.top + 15,
        yBottom: screenTo3DCoordinates.bottom - 5,
        zFront: zPositionOffset,
        zBack: -10,

        fallSpeedMin: 2,
        fallSpeedMax: 3,

        scaleMin: 0.2,
        scaleMax: 1.5,

        diamondOpacity: 0.5,
        mobileDiamondColor: "hsl(45, 80%, 78%)",
        desktopDiamondColor: "hsl(48, 100%, 65%)",
    }

...- I get the camera from the Three.js scene and checks if the user is on a mobile device using the
checkIsMobile()function. - I store the positions of the diamonds using
useState, which stores an array of position, rotation, scale, and fall speed values for each diamond. I also create a reference (diamondsRef) to the diamond objects, allowing the component to manipulate the diamonds directly. - I created a function
screenTo3DCoordinates, which calculates the visible screen's edges in the 3D world, which is used to define where diamonds can spawn. - My
settingsobject defines important parameters for the diamonds, such as:- Count: 10 diamonds on mobile, 20 on desktop
- Spawn Area: Defines the 3D coordinates (left, right, top, bottom, front, back) for where the diamonds can spawn and fall
- Movement: Controls the fall speed of the diamonds, and how fast they rotate as they fall
- Scale: Randomizes the size of each diamond within a defined range
- Appearance: Changes the color and material of diamonds depending on the device
    // Diamond material setup:
    const diamondHDR = useLoader(RGBELoader, "/brown_photostudio_03_1k.hdr")
    const optimisedMaterial = isMobile ? (
        <meshStandardMaterial color={settings.mobileDiamondColor} />
    ) : (
        <MeshRefractionMaterial
            envMap={diamondHDR}
            bounces={3}
            aberrationStrength={0.01}
            ior={2.75}
            fresnel={1}
            color={settings.desktopDiamondColor}
            toneMapped={false}
        />
    )
Material Optimisations for Mobile and Desktop:
For mobile users, a simple meshStandardMaterial with a fixed color is applied for better performance. For desktop users, a more complex refraction material (MeshRefractionMaterial) from Drei is used, which includes environment mapping for realistic reflections using the diamondHDR environment texture.
    // Effects:
    useEffect(() => {
        const initialPositions = []
        for (let i = 0; i < settings.diamondCount; i++) {
            const randomScale = randomNumberWithinRange(
                settings.scaleMin,
                settings.scaleMax
            )
            initialPositions.push({
                x: randomNumberWithinRange(settings.xLeft, settings.xRight),
                y: randomNumberWithinRange(settings.yBottom, settings.yTopMax),
                z: randomNumberWithinRange(settings.zFront, settings.zBack),
                rotation: Math.random() * Math.PI * 2,
                fallSpeed: randomNumberWithinRange(
                    settings.fallSpeedMin,
                    settings.fallSpeedMax
                ),
                scale: [randomScale, randomScale, randomScale],
            })
        }
        setPositions(initialPositions)
    }, [settings.diamondCount])

    useEffect(() => {
        if (diamondsRef.current && positions.length) {
            positions.forEach((pos, i) => {
                const matrix = new THREE.Matrix4()
                matrix.compose(
                    new THREE.Vector3(pos.x, pos.y, pos.z),
                    new THREE.Quaternion().setFromEuler(
                        new THREE.Euler(0, pos.rotation, pos.rotation)
                    ),
                    new THREE.Vector3(...pos.scale)
                )
                diamondsRef.current.setMatrixAt(i, matrix)
            })
            diamondsRef.current.instanceMatrix.needsUpdate = true
        }
    }, [positions])
Diamond Position Initialisation:
Here I initialise random positions for each diamond when the component first renders, setting their initial x, y, z coordinates, rotation, fall speed, and scale. This ensures every diamond has unique behavior and appearance.
These initial values are stored in the positions state and updated in the scene with transformation matrices using the InstancedMesh. The instanceMatrix.needsUpdate flag is set to ensure the renderer uses the latest transformations.
// Render Loop:
useFrame((state, delta) => {
// re-position falling diamonds:
positions.forEach((pos, i) => {
pos.y -= delta * pos.fallSpeed
pos.x -= delta * (pos.fallSpeed / 2)
if (pos.y < settings.yBottom) {
pos.x = randomNumberWithinRange(
settings.xLeft,
settings.xRight
)
pos.y = randomNumberWithinRange(
settings.yTopMin,
settings.yTopMax
)
pos.z = randomNumberWithinRange(
settings.zFront,
settings.zBack
)
}
pos.rotation += pos.fallSpeed * 0.35 * delta
const matrix = new THREE.Matrix4()
matrix.compose(
new THREE.Vector3(pos.x, pos.y, pos.z),
new THREE.Quaternion().setFromEuler(
new THREE.Euler(pos.rotation, pos.rotation, 0)
),
new THREE.Vector3(...pos.scale)
)
diamondsRef.current.setMatrixAt(i, matrix)
})
diamondsRef.current.instanceMatrix.needsUpdate = true
})
return (
<instancedMesh
ref={diamondsRef}
args={[null, null, settings.diamondCount]}
geometry={nodes.Diamond_1_0.geometry}
>
{optimisedMaterial}
</instancedMesh>
)
}
Falling Behavior: The useFrame hook is part of React Three Fiber’s render loop, updating on every frame. It moves each diamond down the screen based on its unique fallSpeed. Additionally, diamonds drift slightly on the x-axis as they fall, and their rotation changes continuously for a spinning effect.
Reset Diamonds: When a diamond moves out of the bottom boundary (yBottom), it’s reset to the top with new random x, y, and z coordinates, making the diamonds endlessly fall.
Rotation: Each diamond’s rotation is updated per frame to create a natural spinning effect as they fall.
Finally, the component renders the instanced diamonds using the instancedMesh, passing the number of instanced diamonds to create to the args, the geometry of the diamond model (nodes.Diamond_1_0.geometry) and the optimisedMaterial.
Creating the Ring Models

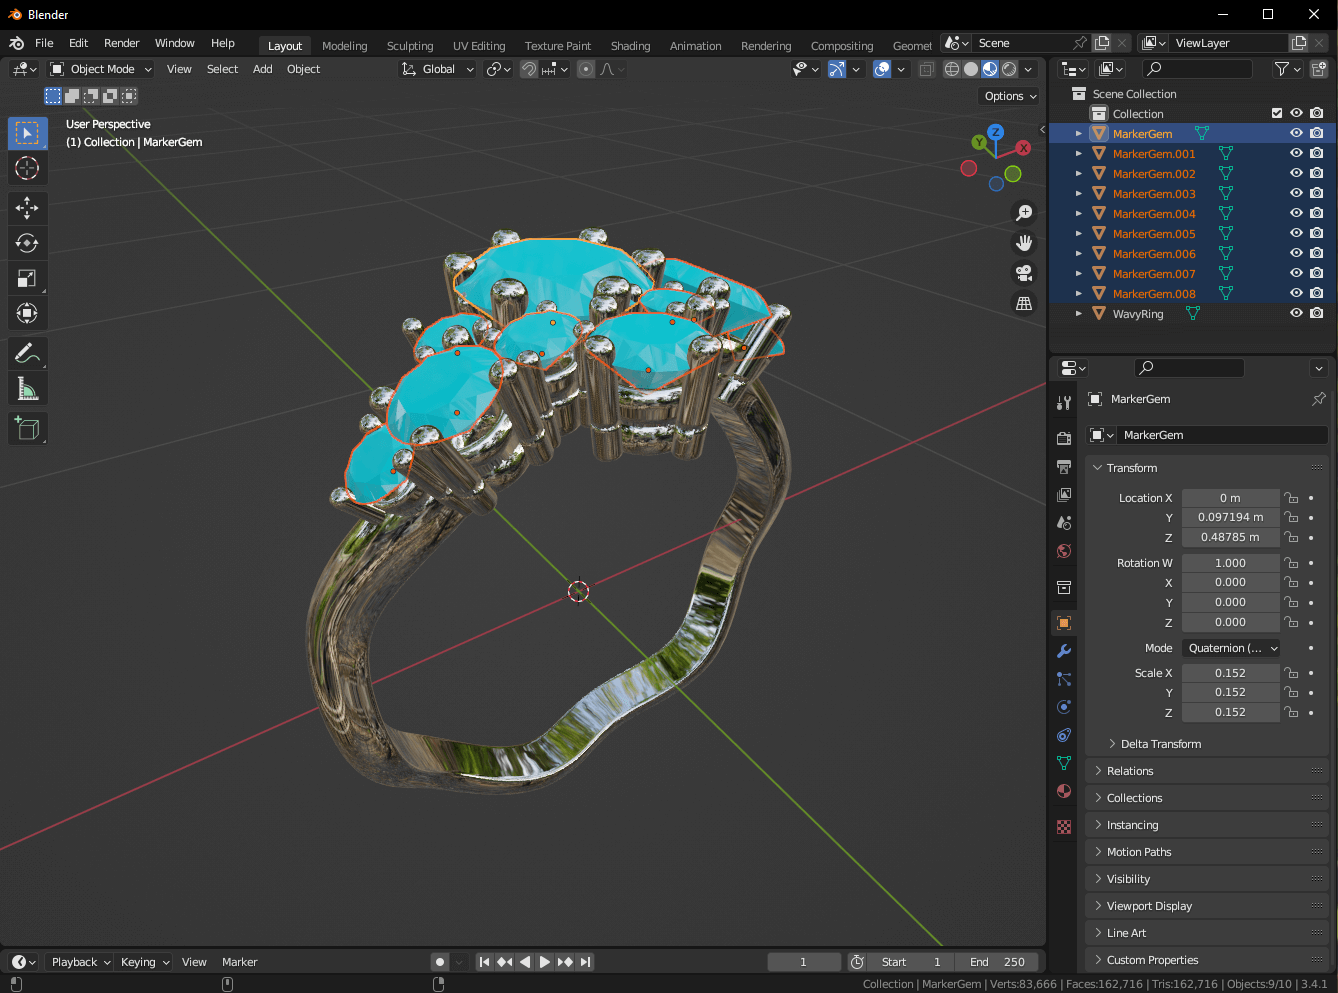
I chose to split the ring model into two parts, one for the ring itself, and a Gem component to handle all the gems that are on that ring. This allowed me to control the gem and load different ring models separatley from each other.
The jewellery models I received from my client did not have any gems placed in them, so working in Blender, I created placeholder meshes called MarkerGem. When I load the exported GLB 3D file into Three.js, I can find all those MarkerGem meshes, .map over all of them as an array and use their position, rotation and scale to place my Gem component. Working with these placeholders was MUCH easier in Blender than trying to precisely move objects around in Three.js, after all that's what 3D editing programs are for. Here's a screenshot of Blender:
Staging the Garden scene and Gazebo
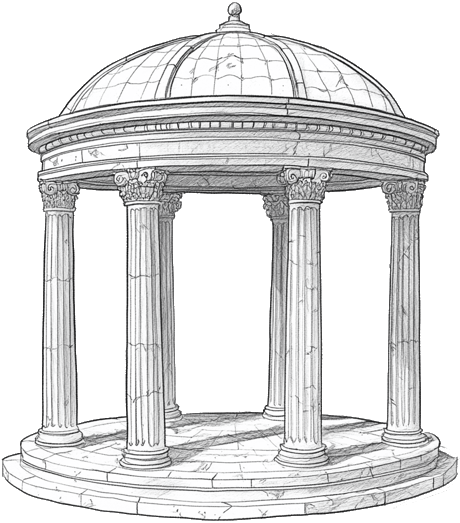
I wanted the ring configurator setting to be elegant, classic and represent the fine craft of jewellery making and that is why I set it in some beautiful gardens and Gazebo.
I will create a new article about the creation of the Gazebo model which I made in Blender and post it in the 3D section soon.
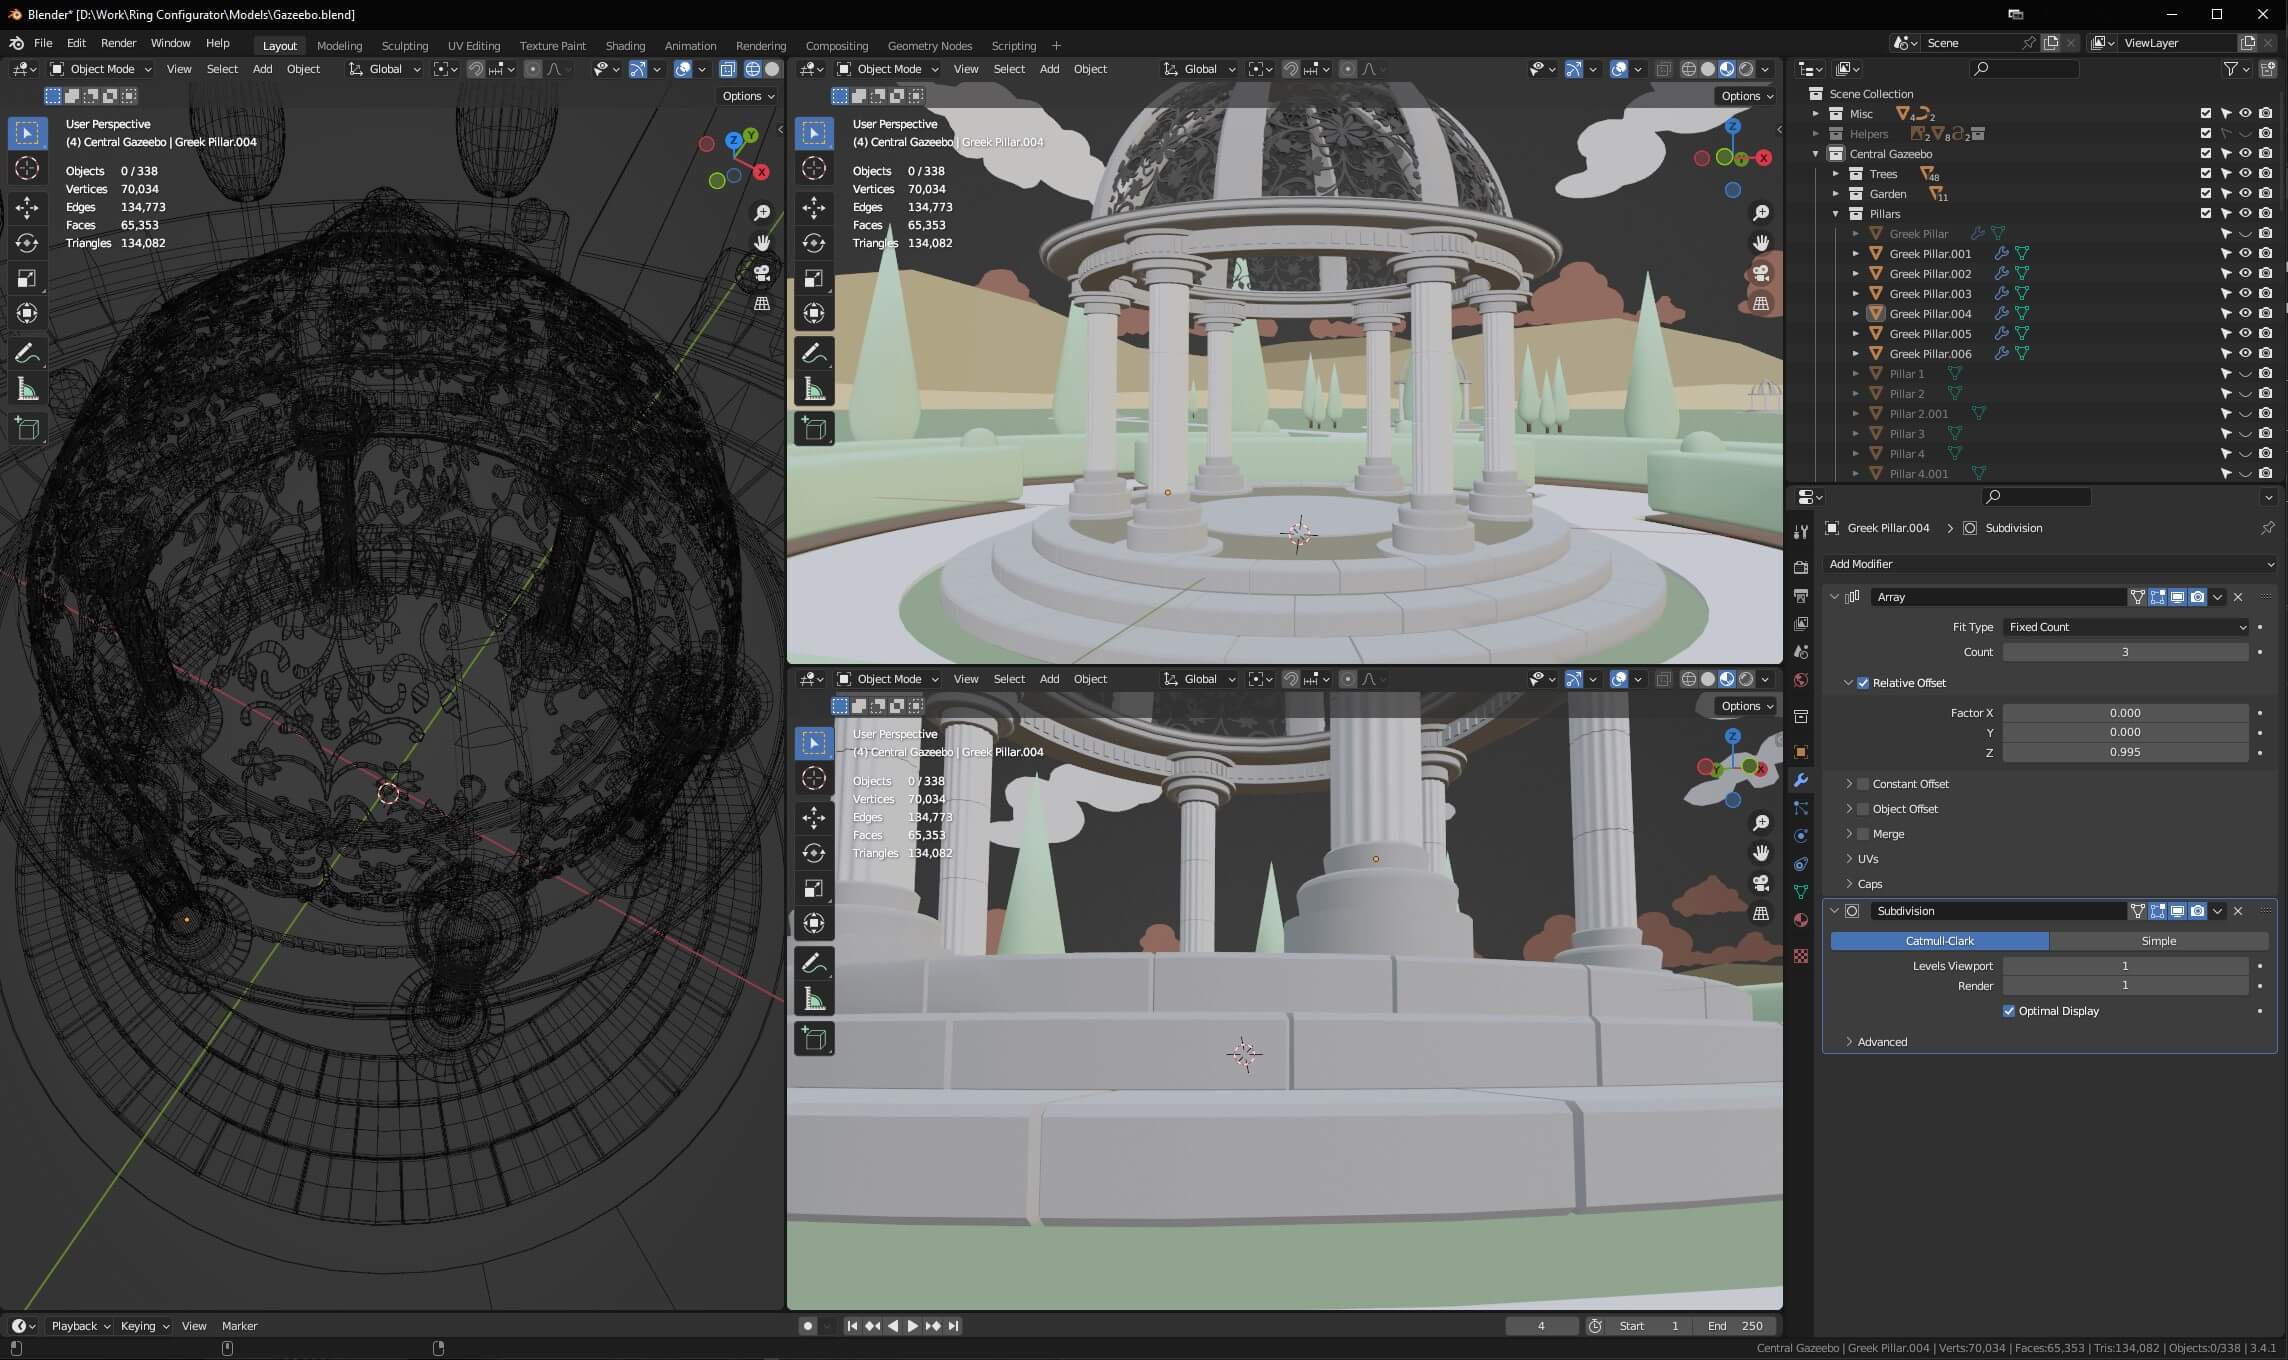
When the time comes to scale this website, I can "activate" the other Gazebos in the scene to show earrings, necklaces or any other service my client wishes to offer.
Carousel rotation
This was a feature I really wanted to add to the website that made the user feel like they were spinning through a collection of options and really visualising the range of possibilities available to them.
I created one Carousel component that would take data, wether that was gems, ring models or metals and build a carousel out of it. Further configurations I setup included the radius of the carousels circle and the rotation speed. It has a circular carousel layout and a randomised table layout, and uses GSAP animations to smoothly transition between the two. Let's take a look into the component:
export const Carousel = ({
    carouselName,
    data,
    radius,
    rotationSpeed = 0.5,
    meshScale = 1,
}) => {

    // Global state:
    const { scene } = useThree()
    const isMobile = checkIsMobile();

    const configStage = useAppStore((state) => state.configStage)
    const configStagePrevious = useAppStore(
        (state) => state.configStagePrevious,
    )
    const carouselIndex = useAppStore(
        (state) => state[carouselName].carouselIndex,
    )
    const carouselRotation = useAppStore(
        (state) => state[carouselName].carouselRotation,
    )
    const carouselPreviousIndex = useAppStore(
        (state) => state[carouselName].carouselPreviousIndex,
    )

    // Local state:
    const [itemMeshes, setItemMeshes] = useState()

    // Local init:
    storeActions.setCarouselLength(data.length, carouselName)

    const carouselRef = useRef()

    const itemNames = Array.from(
        { length: data.length },
        (_, index) => `Carousel ${carouselName} Item ${index}`,
    )

    const angleIncrement = (2 * Math.PI) / data.length

    const carouselPositions = useMemo(() => {
        const positions = []
        for (let i = 0; i < data.length; i++) {
            const angle = i * angleIncrement + Math.PI / 2
            const x = radius * Math.cos(angle)
            const z = radius * Math.sin(angle)
            positions.push([x, 0, z])
        }
        return positions
    }, [])

    const tableInfo = {
        centerPos: [0, 0, 0.475],
        leftEdge: -0.8,
        rightEdge: 0.8,
        backEdge: 0.05,
        frontEdge: 0.5,
    }
    tableInfo.widthRange = [tableInfo.leftEdge, tableInfo.rightEdge]
    tableInfo.depthRange = [tableInfo.backEdge, tableInfo.frontEdge]

    const [randomItemPositions, setRandomItemPositions] = useState(
        Array.from({ length: data.length }, () => [
            0,
            configStages[carouselName].itemTableYPosition,
            0,
        ]),
    )
The component retrieves key values from the global state (useAppStore) for managing:
isMobile: Checks whether the user is on a mobile device, allowing the component to adapt animations and visual elements accordingly (e.g., colour changes or simpler animations for performance).configStageandconfigStagePrevious: Control whether the carousel is currently active or if it’s transitioning to another stage, such as a table view.carouselIndexandcarouselRotation: Determine the current item being focused and how much the carousel has rotated. These values are updated when the user navigates through the carousel.carouselPreviousIndex: Keeps track of the previously selected item to handle its animation when the selection changes.itemMeshes: Stores references to the actual 3D objects (or meshes) of each carousel item. This allows for direct manipulation of the items during animations (e.g., repositioning and resizing).- The
carouselPositionsarray is calculated usinguseMemoto determine the x, y, and z coordinates for each item in a circular layout. TheangleIncrementensures the items are equally spaced around the circumference of the circle. - The component also calculates
randomItemPositionsto place items randomly when the carousel returns all the items back onto the table when the user moves to a different table.
    useEffect(() => {
        storeActions.setChosenItem(data[carouselIndex], carouselName)

        // rotate the whole carousel
        gsap.to(carouselRef.current.rotation, {
            duration: rotationSpeed,
            y: -carouselRotation * angleIncrement,
            ease: 'power1.inOut',
        })

        // get the current carousel mesh
        const carouselFocusMesh = scene.getObjectByName(
            `Carousel ${carouselName} Item ${carouselIndex}`,
        )

        // position/rotate the current mesh like it merged up to the primary rings position
        gsap.to(carouselFocusMesh.position, {
            duration: rotationSpeed,
            y: carouselFocusMesh.position.y + 0.25,
            ease: 'power1.inOut',
        })
        gsap.to(carouselFocusMesh.scale, {
            duration: rotationSpeed,
            x: 0,
            y: 0,
            z: 0,
            ease: 'power1.out',
        })
        gsap.to(carouselFocusMesh.rotation, {
            duration: rotationSpeed,
            y: degToRad(135),
            x: degToRad(180),
            ease: 'power1.inOut',
        })

        // get the previous carousel mesh
        const previouslyFocussedItem = scene.getObjectByName(
            `Carousel ${carouselName} Item ${carouselPreviousIndex}`,
        )

        // return the previouis mesh to it's normal place in the carousel
        if (previouslyFocussedItem) {
            gsap.to(previouslyFocussedItem.position, {
                duration: rotationSpeed,
                // y: 0,
                y: configStages[carouselName].itemCarouselYPosition,
                ease: 'power1.inOut',
            })
            gsap.to(previouslyFocussedItem.scale, {
                duration: rotationSpeed,
                x: meshScale,
                y: meshScale,
                z: meshScale,
                ease: 'power1.out',
            })
            gsap.to(previouslyFocussedItem.rotation, {
                duration: rotationSpeed,
                y: 0,
                x: 0,
                ease: 'power1.inOut',
            })
        }
    }, [carouselRotation])

    useEffect(() => {
        if (!itemMeshes?.length) return

        const duration = 1.25

        // On table stage change...


        // Return to Carousel:

        if (configStage == carouselName) {
            // reset rotation of carousel to where it was when active
            gsap.to(carouselRef.current.rotation, {
                duration: duration,
                // this rotation smoothly rotate back, but it doesn't match the carousel rotation, fix this 'onComplete'
                y: -carouselRotation * angleIncrement,
                ease: 'power1.inOut',
                onComplete: () => {
                    // use a .set so no visual movement occurs
                    // put the rotation back to where it was for the carousel to increment/decrement by one angle rotation properly
                    gsap.set(carouselRef.current.rotation, {
                        y: -carouselRotation * angleIncrement,
                    })
                },
            })

            itemMeshes.forEach((item, index) => {
                // const staggerDelay = 0
                const staggerDelay = randomNumberWithinRange(0, duration * 0.5)

                gsap.to(item.position, {
                    delay: staggerDelay,
                    duration: duration,
                    x: carouselPositions[index][0],
                    z: carouselPositions[index][2],
                    ease: 'power1.inOut',
                })

                // jump up:
                gsap.to(item.position, {
                    delay: staggerDelay,
                    duration: duration * 0.5,
                    y: 0.15,
                    ease: 'power1.inOut',
                })
                gsap.to(item.position, {
                    delay: staggerDelay + duration * 0.5,
                    duration: duration * 0.5,
                    y: configStages[carouselName].itemCarouselYPosition,
                    ease: 'power1.inOut',
                })

                // rotate:
                gsap.to(item.rotation, {
                    delay: staggerDelay,
                    duration: duration,
                    x:
                        carouselName == configStages.gemColor.name
                            ? degToRad(360)
                            : degToRad(0),
                    y: degToRad(180),
                    z: 0,
                    ease: 'power1.inOut',
                })
            })
        }


        // Or, return to Table:

        else {
            // only animate if this carousel was previously active
            if (configStagePrevious != carouselName) return

            itemMeshes.forEach((item, index) => {
                const staggerDelay = randomNumberWithinRange(0, duration / 2)

                // some values can be 360 here, so better rotate from 0 instead or item will jump
                gsap.set(item.rotation, {
                    x: 0,
                    z: 0,
                })

                gsap.to(item.position, {
                    delay: staggerDelay,
                    duration: duration,
                    x: randomItemPositions[index][0],
                    z: randomItemPositions[index][2],
                    ease: 'power1.inOut',
                })

                // jump up:
                gsap.to(item.position, {
                    delay: staggerDelay,
                    duration: duration * 0.5,
                    y: 0.15,
                    ease: 'power1.inOut',
                })
                gsap.to(item.position, {
                    delay: staggerDelay + duration * 0.5,
                    duration: duration * 0.75,
                    y: configStages[configStagePrevious].itemTableYPosition,
                    ease: 'power1.out',
                })

                // rotate:
                gsap.to(item.rotation, {
                    delay: staggerDelay,
                    duration: staggerDelay + duration * 0.7,
                    x:
                        carouselName == configStages.gemColor.name
                            ? degToRad(39)
                            : degToRad(85),
                    y: 0,
                    z:
                        carouselName == configStages.gemColor.name
                            ? degToRad(randomNumberWithinRange(-45, 45))
                            : 0,
                    ease: 'power1.inOut',
                })
            })
        }
    }, [configStage])

    useEffect(() => {
        setItemMeshes(() => {
            const arr = []
            itemNames.forEach((name) => {
                arr.push(scene.getObjectByName(name))
            })
            return arr
        })

        setRandomItemPositions(
            generateRandomPositions(
                data.length,
                tableInfo.widthRange,
                tableInfo.depthRange,
                configStages[carouselName].itemTableYPosition,
            ),
        )
    }, [])
Carousel Rotation:
- When the
carouselRotationchanges (e.g., the user selects a new item), the carousel rotates to bring the selected item to the front. GSAP is used to animate this rotation smoothly. The selected item's position and scale are also animated to make it stand out, rising slightly and shrinking to highlight the selection. - The previously focused item is returned to its normal position on the carousel. This ensures that items rotate back to their original positions when they are no longer in focus.
Stage Change Animations:
- When the
configStagechanges, the carousel items either transition back into the carousel's circular arrangement or spread out back on to the "table" layout. - If the carousel becomes active again, the items rotate back into position using GSAP animations, with a slight delay for each item to create a staggered, dynamic effect.
- If the items transition to the "table" view, they are moved to random positions on the table with custom rotations and scaling to reflect their new layout. This provides a sense of variety and spontaneity.
    return (
        <group
            name={`Outer Carousel ${carouselName}`}
            position={configStages[carouselName].carouselPosition}
            rotation={configStages[carouselName].carouselRotation}
        >
            <group ref={carouselRef} name={`Carousel ${carouselName}`}>
                {data.map((item, index) => {
                    return (
                        <React.Fragment key={index}>
                            {carouselName == configStages.gemColor.name && (
                                <Diamond
                                    name={itemNames[index]}
                                    position={randomItemPositions[index]}
                                    scale={[meshScale, meshScale, meshScale]}
                                    castShadow
                                    receiveShadow
                                    color={
                                        isMobile
                                            ? adjustLightnessFromHSL(
                                                  item.value,
                                                  +60,
                                              )
                                            : item.value
                                    }
                                />
                            )}
                            {carouselName == configStages.ring.name && (
                                <CarouselRing
                                    name={itemNames[index]}
                                    position={randomItemPositions[index]}
                                    rotation={[degToRad(85), 0, 0]}
                                    modelPath={item.value}
                                    meshName={item.meshName}
                                    carouselRingScale={meshScale}
                                    preventGemRotation={true}
                                />
                            )}
                            {carouselName == configStages.metal.name && (
                                <mesh
                                    name={itemNames[index]}
                                    position={randomItemPositions[index]}
                                    castShadow
                                    receiveShadow
                                >
                                    <sphereGeometry args={[0.065, 16, 16]} />
                                    <meshStandardMaterial
                                        color={adjustLightnessFromHSL(
                                            item.value,
                                            -30,
                                        )}
                                        roughness={item.roughness}
                                        envMapIntensity={0.1}
                                    />
                                </mesh>
                            )}
                        </React.Fragment>
                    )
                })}
            </group>
        </group>
    )
}
The carousel is rendered as a <group>, which serves as the container for all the items. The position and rotation of this group are controlled based on the stage configuration, determining whether the carousel is active or inactive.
Each item in the data array is rendered based on its type:
- Diamonds: Rendered using a custom
Diamondcomponent which I also used in theRaindingDiamondscomponent. Depending on whether the user is on mobile, the item's colour is adjusted for better visibility. - Rings: Rendered using a
CarouselRingcomponent, which includes a 3D model loaded from a specific file path. - Metals: Rendered as spherical meshes with custom material properties (e.g., roughness and colour).
Preview the ring on your finger using your phone and Web XR
Now you've created your dream ring, the icing on the cake is trying it on!
The implementation is quite straightforward for this website, if the device supports AR then a button to view the ring will be visible allowing the user to launch the experience. Once launched the user will be able to see their ring and their phones camera will be active allowing them to place the ring over their hand.
WebXR allows the app to run in AR or VR modes through the <XR> component from the @react-three/xr package, which integrates the WebXR API into React Three Fiber.
InteractionManager is responsible for enabling user interactions in this XR space. It ensures users can select, click, or interact with 3D objects inside the XR environment. Without it, user inputs like hand gestures or controller interactions might not be recognised in the immersive context. By wrapping the app inside <InteractionManager>, the app is equipped to handle interactions specific to AR/VR.


