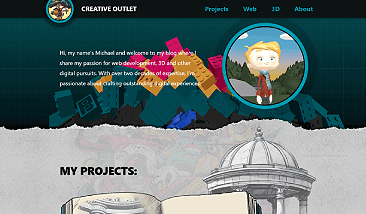
I’ve always wanted a personal space where I can save projects, carry out experiments and share information with others so building my own blog was a great project allowing me to do that.


Leveraging the “JAMstack”
JAM - JavaScript, APIs and Markup. Jamstack is an architecture designed to make the web faster, more secure, and easier to scale. It builds on many of the tools and workflows which Front End developers love, and which bring maximum productivity.
It means this website delivers the markup super fast and secure since the site has already been statically built. JavaScript is then able to enhance the experience on top of the site. Finally there is a plethora of APIs that deliver all sorts of amazing services: like payments, authentication and in the case of this website - content.
The winning trio of Gatsby, Hygraph and Netlify
When making this blog I wanted to work with Gatsbyjs because of it’s great static site generation and since they reached version 5, I really wanted to see the improvements they have made to the build times. This is something the community had asked for and I’m pleased to see the team at Gatsby have answered their call.
I chose to pair Gatsby with a graphQL CMS from Hygraph.
- It’s a headless CMS, freeing me to choose the front end technology I enjoy working with and not forcing me to have to work with what ever it prescribes.
- Webhooks allow me to automatically build and publish my site when ever I create new content.
- It has powerful tools to create my data schema to capture my content the way I wish.
- Querying the data is really quick and easy, and there is even an API playground to run graphql queries.
- It has a great media manager which transforms images on the fly to my website at the most performant sizes and file formats for which ever device it is running on.
The final part of the equation is hosting with Netlify. I love working with this service as they make it so easy to connect websites from GitHub, publish via Webhooks (which works great with Hygraph by the way) and preview branches via pull requests.
Architecting this website for a great workflow

This website is stored in my GitHub repo which is connected to my Netlify account. So when ever I commit some new changes to GitHub, it will push the code changes up to Netlify immediatley. Netlify will automatically start a new build of my site and publish it live, usually within one minute!
My Hygraph CMS is also connected to my Netlify account via a webhook, so that when ever I publish new content in my CMS, it will automatically trigger a new build in Netlify and publish the new content on my site. Magic!
Gatsbys "createPages" function which dynamically creates my pages from my CMS data
Here is my 'gatsby-node.js' file showing the 'createPages' function. This file runs at build time and uses a graphql query to get all my published blogs and their content from Hygraph. This is what dynamically creates all the blog pages on my site based on the returned data.
./gatsby-node.js:
exports.createPages = async ({ graphql, actions: { createPage } }) => {

  // Graphql query to get the published blogs
  // -----------------------------------------------
  const {
    data: {
      gcms: { blogs },
    },
  } = await graphql(`
    {
      gcms {
        blogs(stage: PUBLISHED, orderBy: createdAt_ASC) {
          id
          slug
        }
      }
    }
  `)

  // Then generate the Blog pages
  // -----------------------------------------------
  blogs.forEach(blog => {
    createPage({
      path: `/${blog.slug}`,
      component: require.resolve(`./src/templates/blogArticle.js`),
      context: {
        id: blog.id,
      },
    })
  })

}
When the createPage function is called, it passes an object containing a "component" which is the template file for my blog pages.
When this new page is created from the template, it is passed the "context" object, containing the ID of the blog article in the CMS so that page knows which blog content it has to go and grab to populate that blog article.
Now lets look at the blogArticle.js template and how that works
This template has been passed the blog ID which it uses at the bottom of the following code, in the const 'pageQuery' to do the graphql query. This is still running at build time by the way. Static site generators do all the hard work at build time, which makes them so fast at run time since everything has already been built.
./src/templates/blogArticle.js
import * as React from "react"
import { useEffect } from "react"
import { graphql } from "gatsby"

import Layout from "../components/layout"

import highlightCode from "../utilities/highlightCode"
import { formatDate } from "../utilities/general"

import {
  PageHeaderWrapper,
  PageHeader,
  PageBody,
} from "../components/page.styles"

const IndexPage = ({
  data: {
    gcms: { blog },
  },
}) => {
  const dateBlogPublished = formatDate(blog.createdAt)
  const dateBlogUpdated = blog?.updatedAt ? formatDate(blog.updatedAt) : false

  useEffect(() => {
    highlightCode()
  })

  return (
    <Layout>
      <PageHeaderWrapper>
        <PageHeader>{blog.articleTitle}</PageHeader>
        <div>
          <strong>Published:</strong> {dateBlogPublished}
        </div>
        {dateBlogUpdated && (
          <div>
            <strong>Updated:</strong> {dateBlogUpdated}
          </div>
        )}
      </PageHeaderWrapper>
      <PageBody>
        <div dangerouslySetInnerHTML={{ __html: blog.content.html }} />
      </PageBody>
    </Layout>
  )
}

export const pageQuery = graphql`
  query BlogPageQuery($id: ID!) {
    gcms {
      blog(where: { id: $id }) {
        id
        slug
        createdAt
        updatedAt
        articleTitle
        blogCategory
        content {
          html
        }
      }
    }
  }
`
export default IndexPage
Once the pageQuery has been done, the returned data is ready to be consumed in the JSX and we have a working blog website!


